Limit of Liability and Disclaimer: Reference to "this blog, website and media herein" refers to the blog and website, "concoctingbrews.weebly.com, and the email associated with the blog/website, concoctingbrews.weebly.com. This blog, website and media herein are designed to provide opinion, accurate and authoritative information, not legal advice in regard to the subject matter covered. This blog, website and the email associated with this blog/website aredistributed/displayed with the understanding that the author is not engaged in rendering legal, accounting, or other professional service. Before acting on any suggestion presented in this blog, website or media herein, professional assistance may be advisable. Cooking and brewing of beer can be dangerous and injuries may occur. The author specifically disclaim any liability, loss, or risk, personal or otherwise for application, directly or indirectly, of any advice or information presented in the blog, website and media herein. The author in no way guarantees the accuracy of any of the information appearing in this blog, website or media herein and the opinions stated in this blog, website and media herein. The opinions stated herein are not guaranteed or warranted to produce any particular results, and the advice and strategies contained in the blog/website and media herein may not be suitable for every individual. The website, blog and media herein shall not be liable for any loss of profit or any other commercial damages including but not limited to special, incidental, consequential, or other damages.
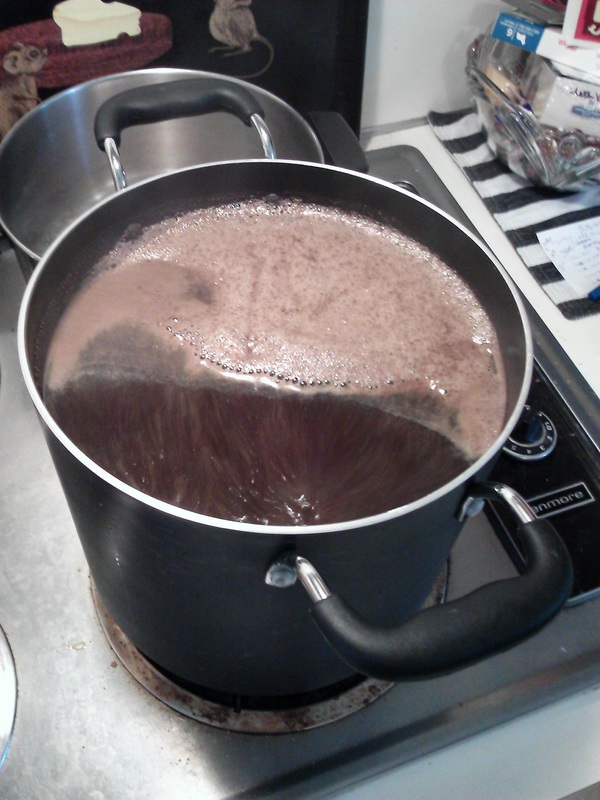
The easiest step is boiling your beer. My stove dial is usually set to 5 1/2 or 6 to boil the beer as I'm trying to get a low boil going. You will have to experiment to find out what a low boil is on your stove. The beer at this stage is known as wort. Keep an eye on the pot when it gets over 200 degrees Fahrenheit. It may foam up and boil over. In case you see rapidly rising foam take it off the burner for a minute and give it a good stir. Keep an eye on it when it is starting to boil. Time the boil and it should be at least 60 minutes. I use my microwave clock to time the boil or you can use an app on your smart phone. Sometimes, you may want to go to a 90 minute boil if you are trying to do a Pilsner. Lighter malts may give a creamed corn taste if it isn't cooked long enough. If you have something with some darker malts to it you may not taste the effect of the Pilsner malts. Toward the end of the boil, you may find that you've boiled away about 20% of the liquid and that is OK.
1. ADDING BITTERING HOPS: It takes awhile to get to boiling and then you add your bittering hops if you are down to 60 minutes for a boil. Most of the time you can do a 60 minute boil. If you were doing the Pilsner you could proceed with a 90 minute boil, but don't add your hops until there are 60 minutes left. Hops put in at about 60 minutes before the end are called bittering hops. That counters the sweetness of the malt. Hops has an antibacterial quality to make beer safe to drink too. Some books cover adding a set amount. You can weigh it with a good kitchen scale to get a specific amount each time. I've gotten to the stage where I just add 2 1/2 pinches, between my thumb and forefinger, of hops pellets just like a cook adds a spice to a meal. I find that that has enough bitterness for me. It is an acquired taste which you will find out for yourself. This is something that balances the sweetness to your beer. Decrease the hops next time if it is too strong for you. Some recipes will help you to determine a good starting quantity.
2. ADDING FLAVOR HOPS: With 15 to 20 minutes to go, you add flavor hops if you feel a need to. Lots of books cover different ways to add hops. Lots of beer recipes might show that the aroma flavor hops and aroma hops are added in less quantities than the bittering ones. Try a recipe out and taste the flavor. If you like the flavor stick with it next time. If not decrease the quantity or change the hops to your liking.
NO CLARIFYING AGENTS - I say "NO" to these now. So, this is no longer a step in the boil process. These agents aren't necessary, but can clear a beer from forming haze. Unfortunately, these agents can cause a loss of beer foam. At about 15 minutes left in the boil, one might add clarifying agents that get rid of beer haze. I was finding that Irish Moss, a clarifier, is used to get rid of the haze. I no longer use Irish Moss because it was getting rid of my beer foam. I'm the main drinker of my beer and I'm willing to put up with a little haze in exchange for good beer foam - it doesn't really change the taste anyway.
3. ADDING AROMA HOPS: In the last minute of the boil, you can add your aroma hops. It's your choice or you can use a recipe and find out what happens to the smell of your beer.
4. BOIL FINISHED: If the boil has reached 60 or 90 minutes, whichever you decided is necessary, take the pot off the stove burner and turn off the heat. Some people may not mind that slight cream corn taste to the lighter Pilsner beers. Try it both ways and find out what you like.
5. COOL DOWN: I could have made this an extra page, but I figured I could put it on the boil blog entry. After boiling, the beer needs to cool down quickly. I brew 1 gallon and I can do it quickly in the sink. If you are doing 5 gallons, you may need to invest in a wort chiller. These are simple instructions; I won't cover the wort chiller here. I place the pot in the sink. I keep the lid on the pot when I'm filling the sink with cold water. The lid protects my beer from splashing that might occur from the faucet keeping contamination to a minimum. I'm attempting to get the sink to a level that matches the liquid level of the beer in the pot in order to cool it. I then add ice from the freezer - I fill up those ice trays the night before.
I stir the beer with a large spoon to decrease heat further while it sits in the ice bath. After 10 minutes, I drain the water that has built up in the sink. Feel that water and you will notice it has gotten a lot warmer from the pot. Cover the drain with the pot again and refill the sink with cold water while the lid is on. Add ice again. Take the lid off and stir the beer again. After 10 minutes do same again: refill sink, add ice and stir. 35 to 40 minutes should have that beer in the right range. Some say it has to cool to 70 degrees. If you have boiled off too much water, from the wort, you can add cool water from a gallon of water you have stored in the refrigerator. With that extra cool water, you can get your wort down further. I use twist ties (used for keeping bread bags fresh) to attach a tiny strainer to the funnel. The funnel goes into the carboy and I pour the beer through the strainer - it catches some of the aroma hops that went into the boil in the end. I'm keeping that extra amount of bitterness from going into my carboy.
6. AERATION & FERMENTATION: Make sure you've saved some room in your fermenter to add the yeast. Never add extra water until you've added your yeast. You may decide to add the yeast right from the package or you may have it soaking in a cup and that entire cup can be added to the beer. Sanitize one hand and place that over the container and give it a good shake. If you have a fermenting bucket it might be best to give it a good stir with your spoon. I then put a blow off tube into the rubber stopper, fill up a cup of water from the sanitizing bucket and find where I'm going to store it for 10 days. Ales can go from 68 to 72 degrees and apartments work well for this. You will need air conditioning in the summer or heat the house to 68 degrees for the winter. If you are dealing with lagers then you might be able to ferment below 64 degrees. Some beer experts might say you can't create lagers outside of the 50's in temperature. I've fermented lagers at 63 degrees, and then I lager (refrigerate) in the 40's and then eventually down to 33 degrees. The cold temperatures take care of any off flavors. Some say you can enjoy your ale in 3 1/2 weeks (10 days to ferment and 2 weeks of bottle conditioning which will be covered later) and 2 days of refrigeration. I can say my lagers need 10 days to ferment; bottle them and keep them where they fermented for 4 more days; then they are lagered in the refrigerator for 3 weeks before I drink a bottle. Bottles should be lagering for 6 weeks for the best conditioning.
Final Note: I find that if you keep your hops in the refrigerator sealed up that they can last for about 6 months or more. I check the strength from tasting a small amount. I also check the aroma by opening the package to see if it gives a strong enough smell. You can keep using the same hops for several batches and that saves money. Fred Scheer used Cluster and Perle Hops on a majority of his recipes and those 2 seem to suit me just fine also. I will cover those more later.
 RSS Feed
