
Welcome to my new free online magazine of homebrewing experiences. I will have regular departments that discuss my factual accounts of what I'm brewing at home, my reviews and ratings of beer ingredients, any new things I'm trying, observations of my experiments, thoughts and analysis and my passions about homebrewing. My focus now are fermented beverages, as a whole, because brewing might involve something between beer and wine. It might be a cider, mead, wine, beer or a hybrid. If you like fermented beverages and don't mind trying to concoct them at home you have come to the right place! There is a lot of content here and I hope to produce my online magazine 4 times a year.
STORIES FROM THE HOME BREWERY
Corn and Molasses Ale Recipe Adapted From American History
(Focus here are records of recipes I've made recently or are about to make. Most of beer recipes will involve perfecting a style. Why test single malt, single hop beers if you need to test it again in a recipe you are trying to perfect? I concentrate on making whole recipes together to see how the ingredients fit together.)
On the day the voters elected new candidates in the U.S., I put together a corn molasses recipe that had the same ingredients from a historical account. The recipe with corn and molasses was placed near an outdoor fire to cook all night. By the next day, it was supposed to be a great tasting ale. It was equal parts of corn and molasses. Most of the details were left out about the specific recipe. I put it together in the way most of my ales would go together:
Brew Water: 2 gallons of RO water with 1 cup poured out each and replaced by 1 cup Brita-filtered Lansing Michigan city water for each container. 1/4 teaspoon of Gypsum as I was trying to simulate water that may have been found in this Upper Peninsula of this state. Details were scant about water analysis for our northern cities. Still researching. I might just try spring water next time!
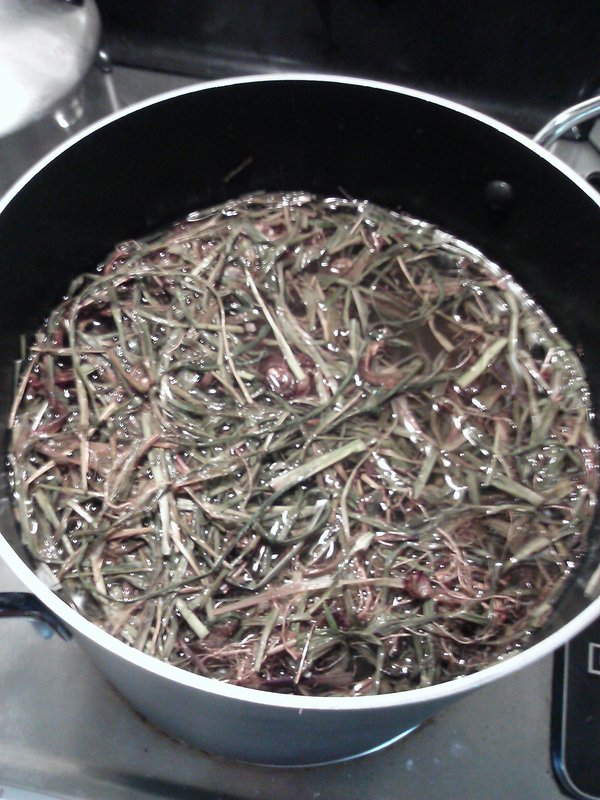
Grain: Corn, that I grew over the summer, was pulled up after 10 days to germinate the seeds. Corn brewing was covered in the Appendix of the book, Brewed in America, by Stanley Baron. This time I put roots and stems (all the corn plant) into the pot to try to get more sugars. Loosely laying in the pot dry, corn plants took up 1/2 of a 2 gallon pot. After 1 1/2 gallons of the brew water was poured in it looked like spinach (pictured above). We had a very wet end of summer and I didn't get to malt these as much as I had liked. Malting is simply putting the corn plants in the sun for an hour at a time to dry them out. I put mine on top of the recycle bin while I'm outdoors mowing or doing other outside chores. In between times, they are stored in a cool place in a paper bag in the basement.
Mashing: I used the corn data for my mash from the chart at:
http://homedistiller.org/forum/viewtopic.php?f=3&t=16799
While the chart is directed to distillers, I've used this for my brewing of various grains.
During the mash, I raised the temperature of the water and grains from room temperature to the first resting temperature. I rested the batch at 150 degrees F for 3 times, 160 F for 3 times and 171 F for 3 times. I use just the pot pictured above which, after I reach temperature, it gets taken off the burner and the lid gets placed on for 7 minutes. In 7 minutes the pot tends to loose 9 degrees of heat. At the end of that time, the pot is placed back on the burner with the lid off. The stove burner is then heated to the next resting temperature. Lastly, I hit a mash out of 176 F.
Sparging and Lautering: I heated the remaining 1/2 gallon of brew water to 170 degrees F. I use 2 strainers and 2 other 3 gallon pots to pour the water and grains back and forth during this phase. About 10-15 minutes are allowed for each time the grains are draining through the strainers. After the extra brew water reached 170 F, I poured that through the strainers to collect 1 more time.
Boil: 1 hour boil.
Hops: Older hops from the fridge, decided to use 3 pinches of Cluster pellet hops at beginning of boil. 5 pinches of Perle pellet hops at 15 minutes before the end of the boil.
Molasses: Organic, 16 oz jar of Blackstrap molasses was poured in slowly for the last 15 minutes while continually stirring the batch.
Cooling: The batch was cooled to about 90 degrees F in the sink with ice. The batch was poured and split up into 4 mini growlers using funnel and strainer.
Yeast: Leftover dry Windsor Ale Yeast (less than a month old) was used in this less than a gallon batch (lots of beer leftover). Yeast was mixed in a coffee mug with 90 degree water left 15 minutes. Initially, I put aluminum foil over the top of the mini growlers before they were placed inside a box in the basement at 65 degrees F. More about open fermentation below.
REVIEWS, RATINGS AND RANKINGS
Safbrew WB-06 Ale vs. Danstar Windsor Ale Dry Yeasts with the Torched Grains - Time Study Also Noted
(A search for the best of the alternative ingredients. Evaluations. Check out these findings and the beers they were utilized in.)
The torched grain batches were fermented with open fermentation (more about this later) for 2 weeks. The batch with WB-06 ale wheat yeast was fermented 1 week at 65 degrees F. and one week at 68 degrees F. The other, an ale yeast fermented the whole time at 65 degrees F. This is in the basement and may fluctuate during the day and night as we adjust the thermostat down 3 degrees at night. Batches were aged at 46 degrees F in a mini-fridge for 3 weeks before tasting.
I reported how I torched grains and brown sugar in my last blog entry. I was disappointed, but very interested in the tasting results. I did find out that the torch merely created a dark grain that was astringent, pungent and as bitter a grain as I had ever tasted. I knew this wasn't coming from the hops as I use a consistent amount each time. I had removed the burned grains out of the batch before brewing hoping the evenly cooked grains would give the best taste. The grains going in were so dry it gave me the same feeling as one gets from a hot summer day without drinking any water - a "cotton mouth" taste was apparent.
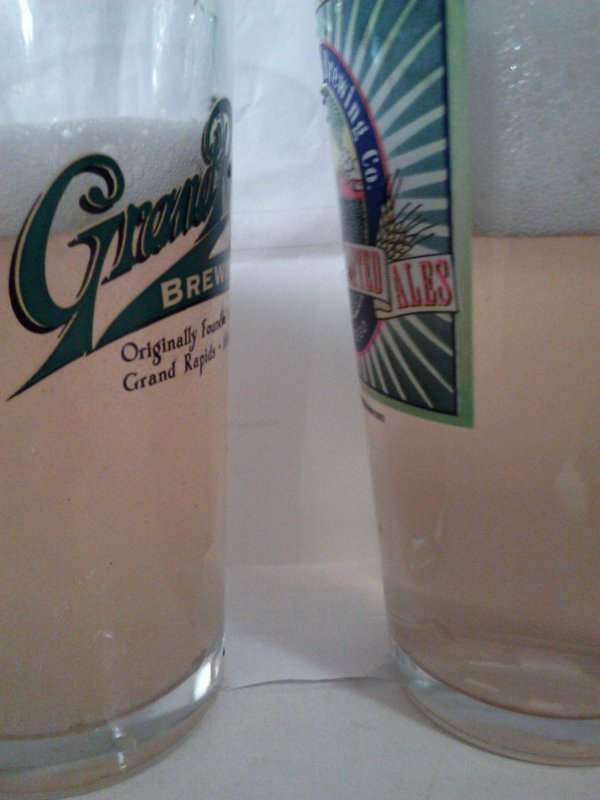
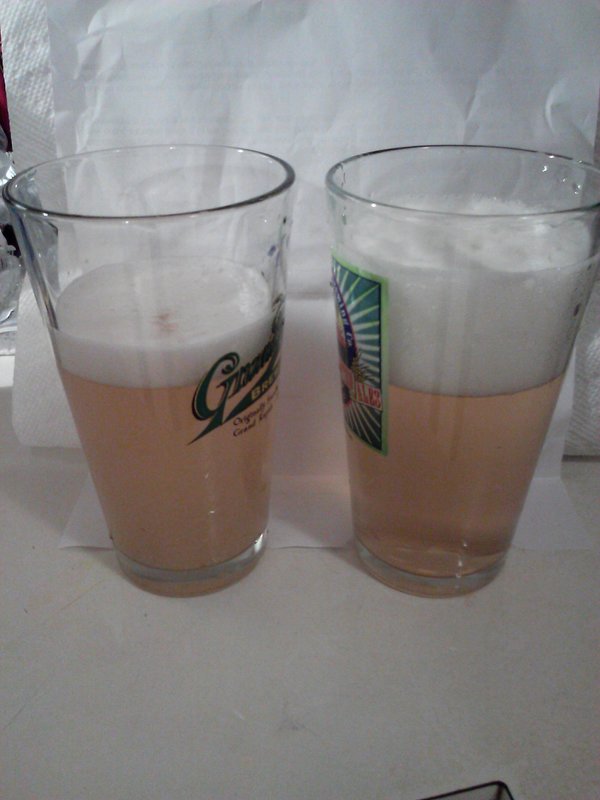
Let's get back to the review. The Windsor Ale yeast was tested in bottles with torched brown sugar for carbonation and compared to non-torched brown sugar samples. The torched grains were in both batches. Sadly, the torch didn't create any expected caramelization of grains nor the brown sugar either. The bottles with torched brown sugar smelled caramelized going into the bottles yielded no change in taste after sampling them later. Both bottles had the strange dry tasting "cotton mouth" feel to them. There were minor differences in their taste, but I couldn't account for what the difference was. Torched brown sugar bottles may have been the reason those had only 1/2 as much foam in them, after the pouring, as compared to the others. I poured as slowly as I could for each. Overall, Windsor Ale yeast put the grain and hop taste right out there so you can really taste it. No other tastes seemed to be coming from the yeast. I noted no estery aroma, but the overly dry beer could have been the culprit here.
The third batch, the wheat ale WB-06 had a banana taste so pronounced at 3 weeks of aging I was amazed. In the background, you could still notice that dry "cotton mouth", astringent taste of the torched grains. No torched brown sugar was used here.
I'm doing a time study for this batch as well. At 3 weeks of aging, the wheat beer had a very strong banana taste. After 4 weeks, the banana taste had mellowed quite a bit. This showed me that wheat beers are subject to time and may be needed to be consumed early on. One week can make a difference. I already mentioned the 2 batches of the ale yeast results. The 4th week made a lot of difference as those very dry beers became less dry in taste. Possibly, dry beers may benefit in a little more aging.
NEW PRODUCTS AND PROCESSES
Mr. Beer Barrel and Cheesecloth Great For Open Fermentation
(To accomplish a cloned beer and other great tasting beverages we may need to make changes now and then.)
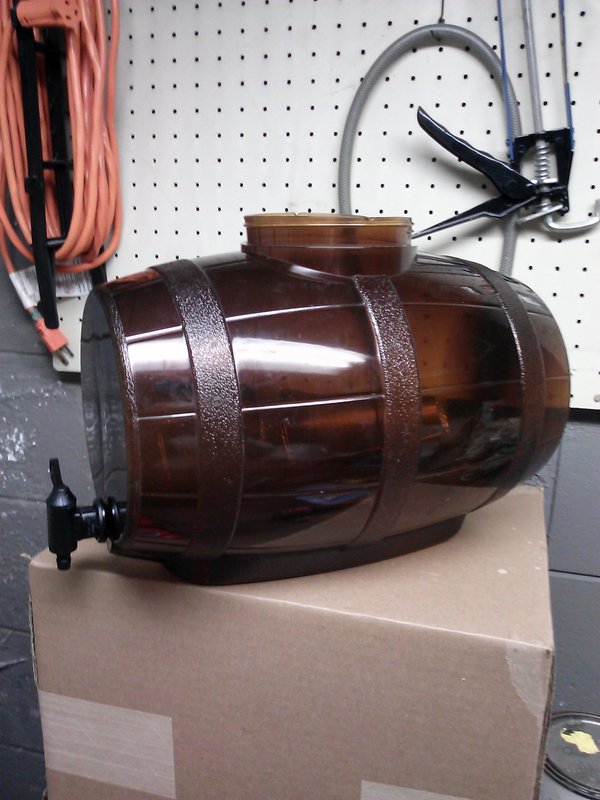
Recently, beer magazines have been discussing creating an open fermentation vessel. I now have moved toward using the Mr. Beer Barrel for my open fermentation. (Pictured above beer barrel) We had an issue with fruit flies this summer and the cheesecloth works well fitting over the opening with either rubber bands or duct tape to hold it in place. Other homebrewers are looking at removing the oxygen, but I'm looking at bringing out the esters through open fermentation much like how brewing may have been done in the past. The Mr. Beer Barrel is perfect and economical for those that don't want the trouble and expense of adapting a wood barrel. The spigot assembly makes it really easy to bottle later on instead of trying to siphon. I do limit access of wild yeast by placing my fermentation vessels in boxes loosely closed.
BREW VIEWS
Torch Creates Very Dry Beer - No Carmelizing
(New observations from my brewing experiences that may differ from other experts and authors have found.)
Most of the results about the torched grains and brown sugar are shown above in the yeast review. My observations have shown that torching will not caramelize grains nor brown sugar. While you may be able to caramelize brown sugar to eat right then, once bottled in the brewing process, no caramelizing of the brown sugar will be apparent later. So far, I've found that taking a portion of grains out of the pot and with 10 minutes of pan frying and constant stirring there is some caramelizing. This 10 minute pan frying of grains repeated 3 times gives me significant caramelizing later in my beers. I use Pilsner and Dark Munich grains when I followed this decoction in the past.
DRAUGHT THOUGHTS
German Beer Clones: In Search Of Bubblegum Esters
(I gather data and analyze my alternatives. My objective is to make something better than what I've made before. I voice my opinions here on what I may have found.)
I've researched quite a bit to clone a German beer. I've covered links to websites and have found that bubblegum esters are present when my favorite beer was reviewed. While all wheat beers might have the taste of clove phenols and banana esters, the true clue to the yeast is the taste of bubblegum. There are only a few yeasts that will give a bubblegum taste. This helps to narrow down the yeast possibilities. There was an article on the internet that discussed Bavarian Weissbier. It's here:
http://braumagazin.de/article/brewing-bavarian-weissbier-all-you-ever-wanted-to-know/
It discusses the acetate known as 4VG and Weihenstephan 175 yeast. I now know that I have to increase the ethyl acetate to get the banana notes to drop out to give me the bubblegum flavors I need. Weihenstephan 68, Wyeast 3638, WLP351 and WLP380 have the capability to give me that bubblegum flavor without clove or banana dominating. I'm one step closer to reproducing my favorite beer. I'll keep you posted as I find more things out.
IN FRONT OF THE HEARTH
Food Pairing With Beer: Pretzels
(Much like one would reflect on resolutions in front of a fireplace on New Years Eve, this section will show you my interests or what I'm passionate about in homebrewing. Just the joy of innovation and "what-if" scenarios as I try new things out to create new ideas in the brewing world.)
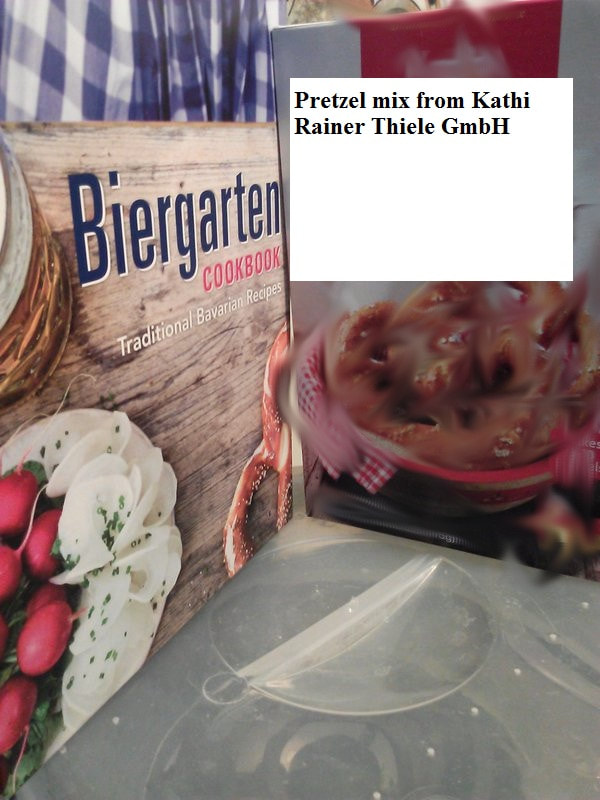
Many beer drinkers have their favorite foods that go with their brew: be it cheese, nuts or even pretzels. I had a chance to taste really great hot pretzels and fresh made mustards while dining out with my wife. Unfortunately, the restaurant changed the menu and those items were soon gone. The stale pretzels from the grocery stores weren't cutting it any longer. I tried some German pretzels from the specialty store, World Market, that weren't bad. I was surprised to find the German company made the pretzels in Italy! I still desired to get a great tasting hot pretzel again. I found a German Pretzel Mix at the same store World Market. I also came across a German Biergarten Cookbook with recipes, including a hot pretzel, from Julia Skowronek. (Pictured above) Beer is being paired with all kinds of food these days. Doesn't your great beer deserve great food to be paired with it? If either recipe is really great I'll let you know next time.
WHAT'S BREWING NEXT TIME?
Schwartzbier: Formerly Fred Scheer's Frankenmuth Dark
STORIES FROM THE HOME BREWERY
Corn and Molasses Ale Recipe Adapted From American History
(Focus here are records of recipes I've made recently or are about to make. Most of beer recipes will involve perfecting a style. Why test single malt, single hop beers if you need to test it again in a recipe you are trying to perfect? I concentrate on making whole recipes together to see how the ingredients fit together.)
On the day the voters elected new candidates in the U.S., I put together a corn molasses recipe that had the same ingredients from a historical account. The recipe with corn and molasses was placed near an outdoor fire to cook all night. By the next day, it was supposed to be a great tasting ale. It was equal parts of corn and molasses. Most of the details were left out about the specific recipe. I put it together in the way most of my ales would go together:
Brew Water: 2 gallons of RO water with 1 cup poured out each and replaced by 1 cup Brita-filtered Lansing Michigan city water for each container. 1/4 teaspoon of Gypsum as I was trying to simulate water that may have been found in this Upper Peninsula of this state. Details were scant about water analysis for our northern cities. Still researching. I might just try spring water next time!
Grain: Corn, that I grew over the summer, was pulled up after 10 days to germinate the seeds. Corn brewing was covered in the Appendix of the book, Brewed in America, by Stanley Baron. This time I put roots and stems (all the corn plant) into the pot to try to get more sugars. Loosely laying in the pot dry, corn plants took up 1/2 of a 2 gallon pot. After 1 1/2 gallons of the brew water was poured in it looked like spinach (pictured above). We had a very wet end of summer and I didn't get to malt these as much as I had liked. Malting is simply putting the corn plants in the sun for an hour at a time to dry them out. I put mine on top of the recycle bin while I'm outdoors mowing or doing other outside chores. In between times, they are stored in a cool place in a paper bag in the basement.
Mashing: I used the corn data for my mash from the chart at:
http://homedistiller.org/forum/viewtopic.php?f=3&t=16799
While the chart is directed to distillers, I've used this for my brewing of various grains.
During the mash, I raised the temperature of the water and grains from room temperature to the first resting temperature. I rested the batch at 150 degrees F for 3 times, 160 F for 3 times and 171 F for 3 times. I use just the pot pictured above which, after I reach temperature, it gets taken off the burner and the lid gets placed on for 7 minutes. In 7 minutes the pot tends to loose 9 degrees of heat. At the end of that time, the pot is placed back on the burner with the lid off. The stove burner is then heated to the next resting temperature. Lastly, I hit a mash out of 176 F.
Sparging and Lautering: I heated the remaining 1/2 gallon of brew water to 170 degrees F. I use 2 strainers and 2 other 3 gallon pots to pour the water and grains back and forth during this phase. About 10-15 minutes are allowed for each time the grains are draining through the strainers. After the extra brew water reached 170 F, I poured that through the strainers to collect 1 more time.
Boil: 1 hour boil.
Hops: Older hops from the fridge, decided to use 3 pinches of Cluster pellet hops at beginning of boil. 5 pinches of Perle pellet hops at 15 minutes before the end of the boil.
Molasses: Organic, 16 oz jar of Blackstrap molasses was poured in slowly for the last 15 minutes while continually stirring the batch.
Cooling: The batch was cooled to about 90 degrees F in the sink with ice. The batch was poured and split up into 4 mini growlers using funnel and strainer.
Yeast: Leftover dry Windsor Ale Yeast (less than a month old) was used in this less than a gallon batch (lots of beer leftover). Yeast was mixed in a coffee mug with 90 degree water left 15 minutes. Initially, I put aluminum foil over the top of the mini growlers before they were placed inside a box in the basement at 65 degrees F. More about open fermentation below.
REVIEWS, RATINGS AND RANKINGS
Safbrew WB-06 Ale vs. Danstar Windsor Ale Dry Yeasts with the Torched Grains - Time Study Also Noted
(A search for the best of the alternative ingredients. Evaluations. Check out these findings and the beers they were utilized in.)
The torched grain batches were fermented with open fermentation (more about this later) for 2 weeks. The batch with WB-06 ale wheat yeast was fermented 1 week at 65 degrees F. and one week at 68 degrees F. The other, an ale yeast fermented the whole time at 65 degrees F. This is in the basement and may fluctuate during the day and night as we adjust the thermostat down 3 degrees at night. Batches were aged at 46 degrees F in a mini-fridge for 3 weeks before tasting.
I reported how I torched grains and brown sugar in my last blog entry. I was disappointed, but very interested in the tasting results. I did find out that the torch merely created a dark grain that was astringent, pungent and as bitter a grain as I had ever tasted. I knew this wasn't coming from the hops as I use a consistent amount each time. I had removed the burned grains out of the batch before brewing hoping the evenly cooked grains would give the best taste. The grains going in were so dry it gave me the same feeling as one gets from a hot summer day without drinking any water - a "cotton mouth" taste was apparent.
Let's get back to the review. The Windsor Ale yeast was tested in bottles with torched brown sugar for carbonation and compared to non-torched brown sugar samples. The torched grains were in both batches. Sadly, the torch didn't create any expected caramelization of grains nor the brown sugar either. The bottles with torched brown sugar smelled caramelized going into the bottles yielded no change in taste after sampling them later. Both bottles had the strange dry tasting "cotton mouth" feel to them. There were minor differences in their taste, but I couldn't account for what the difference was. Torched brown sugar bottles may have been the reason those had only 1/2 as much foam in them, after the pouring, as compared to the others. I poured as slowly as I could for each. Overall, Windsor Ale yeast put the grain and hop taste right out there so you can really taste it. No other tastes seemed to be coming from the yeast. I noted no estery aroma, but the overly dry beer could have been the culprit here.
The third batch, the wheat ale WB-06 had a banana taste so pronounced at 3 weeks of aging I was amazed. In the background, you could still notice that dry "cotton mouth", astringent taste of the torched grains. No torched brown sugar was used here.
I'm doing a time study for this batch as well. At 3 weeks of aging, the wheat beer had a very strong banana taste. After 4 weeks, the banana taste had mellowed quite a bit. This showed me that wheat beers are subject to time and may be needed to be consumed early on. One week can make a difference. I already mentioned the 2 batches of the ale yeast results. The 4th week made a lot of difference as those very dry beers became less dry in taste. Possibly, dry beers may benefit in a little more aging.
NEW PRODUCTS AND PROCESSES
Mr. Beer Barrel and Cheesecloth Great For Open Fermentation
(To accomplish a cloned beer and other great tasting beverages we may need to make changes now and then.)
Recently, beer magazines have been discussing creating an open fermentation vessel. I now have moved toward using the Mr. Beer Barrel for my open fermentation. (Pictured above beer barrel) We had an issue with fruit flies this summer and the cheesecloth works well fitting over the opening with either rubber bands or duct tape to hold it in place. Other homebrewers are looking at removing the oxygen, but I'm looking at bringing out the esters through open fermentation much like how brewing may have been done in the past. The Mr. Beer Barrel is perfect and economical for those that don't want the trouble and expense of adapting a wood barrel. The spigot assembly makes it really easy to bottle later on instead of trying to siphon. I do limit access of wild yeast by placing my fermentation vessels in boxes loosely closed.
BREW VIEWS
Torch Creates Very Dry Beer - No Carmelizing
(New observations from my brewing experiences that may differ from other experts and authors have found.)
Most of the results about the torched grains and brown sugar are shown above in the yeast review. My observations have shown that torching will not caramelize grains nor brown sugar. While you may be able to caramelize brown sugar to eat right then, once bottled in the brewing process, no caramelizing of the brown sugar will be apparent later. So far, I've found that taking a portion of grains out of the pot and with 10 minutes of pan frying and constant stirring there is some caramelizing. This 10 minute pan frying of grains repeated 3 times gives me significant caramelizing later in my beers. I use Pilsner and Dark Munich grains when I followed this decoction in the past.
DRAUGHT THOUGHTS
German Beer Clones: In Search Of Bubblegum Esters
(I gather data and analyze my alternatives. My objective is to make something better than what I've made before. I voice my opinions here on what I may have found.)
I've researched quite a bit to clone a German beer. I've covered links to websites and have found that bubblegum esters are present when my favorite beer was reviewed. While all wheat beers might have the taste of clove phenols and banana esters, the true clue to the yeast is the taste of bubblegum. There are only a few yeasts that will give a bubblegum taste. This helps to narrow down the yeast possibilities. There was an article on the internet that discussed Bavarian Weissbier. It's here:
http://braumagazin.de/article/brewing-bavarian-weissbier-all-you-ever-wanted-to-know/
It discusses the acetate known as 4VG and Weihenstephan 175 yeast. I now know that I have to increase the ethyl acetate to get the banana notes to drop out to give me the bubblegum flavors I need. Weihenstephan 68, Wyeast 3638, WLP351 and WLP380 have the capability to give me that bubblegum flavor without clove or banana dominating. I'm one step closer to reproducing my favorite beer. I'll keep you posted as I find more things out.
IN FRONT OF THE HEARTH
Food Pairing With Beer: Pretzels
(Much like one would reflect on resolutions in front of a fireplace on New Years Eve, this section will show you my interests or what I'm passionate about in homebrewing. Just the joy of innovation and "what-if" scenarios as I try new things out to create new ideas in the brewing world.)
Many beer drinkers have their favorite foods that go with their brew: be it cheese, nuts or even pretzels. I had a chance to taste really great hot pretzels and fresh made mustards while dining out with my wife. Unfortunately, the restaurant changed the menu and those items were soon gone. The stale pretzels from the grocery stores weren't cutting it any longer. I tried some German pretzels from the specialty store, World Market, that weren't bad. I was surprised to find the German company made the pretzels in Italy! I still desired to get a great tasting hot pretzel again. I found a German Pretzel Mix at the same store World Market. I also came across a German Biergarten Cookbook with recipes, including a hot pretzel, from Julia Skowronek. (Pictured above) Beer is being paired with all kinds of food these days. Doesn't your great beer deserve great food to be paired with it? If either recipe is really great I'll let you know next time.
WHAT'S BREWING NEXT TIME?
Schwartzbier: Formerly Fred Scheer's Frankenmuth Dark
 RSS Feed
